Home
Home
How to Master Animation Curves in the Maya Graph Editor
The Maya Graph Editor is a Position-Time visualizer where the X-axis represents frames and the Y-axis represents attribute values. Unlike software that uses speed graphs, Maya requires you to read the slope of the curve to determine velocity: a steeper curve indicates faster motion, while a flat curve indicates a pause. To optimize your workflow in 2026, focus on mastering Weighted Tangents for organic easing and the Euler Filter to resolve rotation glitches like gimbal lock.
What Is the Maya Graph Editor and Why Is It Essential?
In the world of professional 3D animation, the Graph Editor stands out as a premier tool for fine-tuning motion. At its core, the Graph Editor is a visual representation of animated attributes over time. While the Viewport shows you what is moving, the Graph Editor shows you how it is moving. According to official Autodesk documentation , animation curves are the mathematical interpolation between keyframes, allowing for precise control over acceleration and deceleration.
Understanding the X/Y logic is the first step toward mastery. The horizontal X-axis represents Time (measured in frames or seconds), while the vertical Y-axis represents the Value of the attribute (such as Translate Y, Rotate X, or Scale Z). By manipulating the shape of the line connecting two keyframes, you are directly editing the spacing of the animation. A straight line results in constant speed, whereas a curved line creates "eases," which are fundamental to the 12 principles of animation.
For high-end film and game production, the Graph Editor is widely considered one of the most important interfaces. It allows animators to "read" motion without even looking at the character. A seasoned professional can look at a curve and identify a heavy footfall, a snappy eye blink, or a floating arm just by observing the peaks, valleys, and slopes of the data. As of 2026, the modern UI has further streamlined this process, making it a top-tier choice for technical artists.
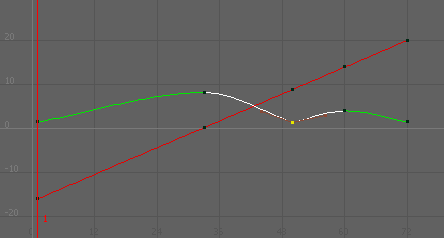
Image source: download.autodesk.com
How to Open and Navigate the Graph Editor Interface
Accessing the tool is straightforward: navigate to Windows > Animation Editors > Graph Editor . In the 2026 version of Maya, the interface has been refined to reduce visual clutter, though the "Classic" view remains available for those who prefer the legacy layout. The modern UI features updated icons that are more intuitive for new users while retaining the deep functionality required by veterans.
Essential Navigation Shortcuts
Navigating the graph efficiently is a hallmark of a productive animator. Relying on scroll bars is a significant bottleneck; instead, use these industry-standard shortcuts to move through your curves:
- Alt + Right Mouse Button
- Zooming the view in and out. Dragging horizontally zooms time; dragging vertically zooms values.
- Alt + Middle Mouse Button
- Panning the view across the timeline or value range.
- F Key
- Framing selected keys. This is a highly effective way to focus on a specific section of your animation.
- A Key
- Framing the entire animation. Use this to get a bird's-eye view of all curves in the scene.
The 2026 update also includes enhanced "Isolate Selected" features. By toggling the Isolate button in the Graph Editor toolbar, you can focus exclusively on the curves of the objects you have selected in the Viewport, preventing the "spaghetti" look that occurs when multiple complex rigs are active simultaneously.
Why Maya Does Not Have a Speed Graph and How to Read Slope Instead
A common point of confusion for users transitioning from motion graphics software like After Effects is the search for a "Speed Graph." It is important to clarify that Maya does not natively use a Speed-Time graph; instead, it operates on a Position-Time basis. In a Speed Graph, the Y-axis represents velocity. In Maya, the Y-axis represents the actual coordinate or rotation value.
To understand speed in Maya, you must learn to read the slope of the curve. This conceptual shift is vital for precise timing:
- Steep Slope: A sharp vertical climb or drop indicates that the value is changing rapidly over a short period. This represents fast motion.
- Shallow Slope: A gentle, near-horizontal line indicates the value is changing slowly. This represents slow motion.
- Flat Line: A perfectly horizontal line means the value is not changing at all. This represents a pause or a "hold."
Mastering Tangent Types for Different Motion Styles
Tangents determine how Maya interpolates the space between your keyframes. Choosing the right tangent type is a significant step toward achieving the desired "feel" for your motion. Maya offers several presets that rank among the most useful tools for blocking and polishing.
| Tangent Type | Visual Shape | Best Use Case |
|---|---|---|
| Spline | Smooth, continuous curve | Fluid, organic motion like a tail wag or a slow turn. |
| Linear | Straight, diagonal lines | Robotic movement, constant camera pans, or mechanical parts. |
| Stepped | Square, "staircase" steps | The "Blocking" phase where you want to see poses without in-betweens. |
| Clamped | Flattened at peaks | Preventing "overshoot" where a curve dips below a floor or above a limit. |
During the early stages of animation, Stepped Tangents are highly recommended. They allow you to focus on the storytelling poses without being distracted by Maya's automatic (and often messy) interpolation. Once the timing is locked, switching to Spline or Auto Tangents provides a base for the polishing phase.
How to Use Weighted Tangents for Precise Control
Weighted tangents are a notably innovative feature that allows for "pulling" a curve's influence without adding extra keyframes. By default, Maya uses non-weighted tangents, where the handles have a fixed length. Enabling weights gives you the ability to stretch the tangent handle, increasing the "gravity" of that keyframe on the curve.
To enable this, go to Curves > Weighted Tangents in the Graph Editor menu. Once enabled, you must also "Free Tangent Weights" (found in the toolbar) to move the handles independently. This technique is exceptionally strong for creating organic "slow-outs" or "slow-ins." For example, in a bouncing ball animation, a weighted tangent at the peak of the bounce can make the ball appear to "hang" in the air longer, creating a more convincing sense of gravity than a standard spline curve could achieve.
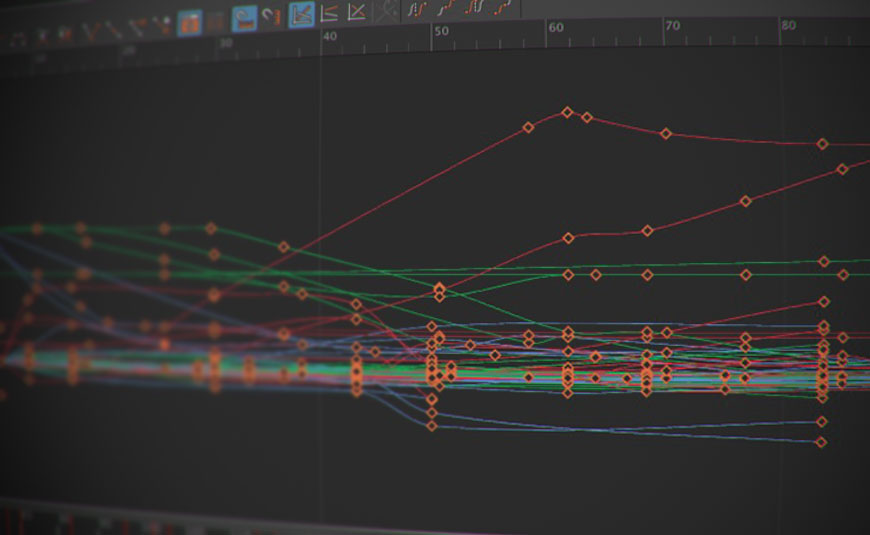
Image source: Lesterbanks
Advanced Tools for Refining Your Animation
Once you understand the basics, you can utilize advanced tools to solve complex technical hurdles. These tools are often what separate amateur work from professional-grade production.
Fixing Gimbal Lock with the Euler Filter
Gimbal lock is a common frustration where rotation curves appear to "flip" or spin 360 degrees unnecessarily between two keys. This happens because of how Maya calculates 3D rotation axes. The Euler Filter is a top-rated solution for this. By selecting your rotation curves and navigating to Curves > Euler Filter , Maya will recalculate the mathematical values to create the cleanest possible path between keys, eliminating the erratic spinning.
Breaking Tangents for Sharp Motion
Sometimes you need a curve to change direction instantly—for instance, when a ball hits the ground. By default, tangents are "unified," meaning moving one side moves the other to keep the curve smooth. Using the Break Tangents icon (the V-shaped icon in the toolbar) allows you to move the left and right handles independently. This creates a "broken" tangent, essential for sharp impacts and sudden changes in momentum.
Precision Movement and Scaling
For those who require absolute precision, the Stats Box at the top left of the Graph Editor allows you to type in exact frame numbers and attribute values. Additionally, using Shift + Middle Mouse Drag locks your movement to either the horizontal or vertical axis, preventing accidental timing shifts when you only meant to change a value.
Troubleshooting Common Graph Editor Issues
Even for experienced users, the Graph Editor can sometimes behave unexpectedly. Addressing these common pitfalls early can save hours of frustration.
If your Graph Editor is empty, ensure the object is actually selected in the Viewport or Outliner. Also, check if the "Isolate Selected" toggle is accidentally turned on without a selection.
Check the "Show" menu in the Graph Editor. Sometimes specific attributes (like Scale or Visibility) are filtered out. Resetting the "Show" menu usually brings them back.
If the window opens off-screen, try resetting your Workspace (Windows > Workspaces > Reset Current Workspace). This is a common issue when switching between multi-monitor setups.
Sculpting vs. Chiseling: Which Animation Workflow Is Best?
There is an ongoing debate in the animation community regarding the "Pose-to-Pose" (Chiseling) vs. "Curve-Centric" (Sculpting) workflow. Expert animators often suggest thinking of the Graph Editor as "sculpting motion from clay." In this approach, you set minimal keyframes and use the Graph Editor's interpolation to do the heavy lifting, adjusting tangents to find the flow.
Conversely, the "Chiseling" approach involves setting many key poses (often every 2-4 frames) to maintain absolute control over the character's silhouette. While this prevents Maya from making "bad" interpolation choices, it can make the Graph Editor very difficult to manage due to the high density of keys. Most AAA professionals find a middle ground: they use heavy posing for complex body mechanics but switch to a curve-centric approach for secondary motion like hair, capes, or tails. Isolating individual channels (e.g., focusing only on Translate Y) is a highly effective way to manage this complexity without becoming overwhelmed by the "matrix" of curves.
How Plugins Like AnimBot and A-Tools Change the Game
While Maya's native tools are exceptionally strong, industry-standard plugins like AnimBot have become a staple in professional pipelines. These tools augment the Graph Editor by adding "Micro-tweening" capabilities, which allow you to slide a keyframe's value toward the previous or next key with a simple slider. They also offer "Ease-to-Ease" buttons that automatically set up complex weighted tangents with a single click, significantly reducing the number of manual adjustments required during the polish phase.
Graph Editor vs. Dope Sheet: When to Use Which?
It is important to distinguish between the Graph Editor and the Dope Sheet, as they serve different purposes in the animator's toolkit. While the Graph Editor is for Spacing (the feel of the motion), the Dope Sheet is for Timing (when things happen).
| Task | Recommended Tool | Why |
|---|---|---|
| Moving entire blocks of animation | Dope Sheet | Easier to see the "big picture" of keyframe placement across multiple objects. |
| Fixing a "jittery" arm | Graph Editor | Allows you to see the tiny spikes in the curve causing the jitter. |
| Adjusting the weight of a jump | Graph Editor | Essential for editing the acceleration/deceleration of the Y-axis. |
| Changing the frame a character blinks | Dope Sheet | Quickly slide the keyframe without worrying about the value. |
Key Takeaways for Mastering Maya Curves
- Position-Time Logic: Remember that Maya uses a Position-Time graph; read the slope to understand velocity.
- Navigation Mastery: Use Alt + Mouse shortcuts and the F/A keys to move through your data quickly.
- Tangent Selection: Use Stepped for blocking and Spline/Weighted for organic polishing.
- Euler Filter: Always apply the Euler Filter to rotation curves to resolve gimbal lock and flipping issues.
- Weighted Tangents: Enable weights to create sophisticated eases without adding redundant keyframes.
- Channel Isolation: Focus on one attribute at a time (e.g., Translate Y) to avoid visual clutter in complex rigs.
Start by taking a simple bouncing ball animation and experiment with breaking tangents at the point of impact to see how it immediately improves the realism of your motion.
Frequently Asked Questions
How do I fix the Maya Graph Editor if it’s not showing curves?
What is the difference between the Graph Editor and the Dope Sheet?
What are the most essential hotkeys for the Maya Graph Editor?
How do I change the interpolation of keys?
Why are my rotation curves spinning 360 degrees?
Can I see a Speed Graph in Maya?