Home
Home
How to Use the After Effects Graph Editor for Smooth and Professional Animations
The After Effects Graph Editor is a visual tool used to control the timing and spacing of animations. By default, keyframes are linear, resulting in robotic movement. To achieve professional results, select your keyframes, press F9 (Easy Ease) , and enter the Graph Editor (Shift + F3). Use the Speed Graph to control velocity or the Value Graph (after selecting "Separate Dimensions") to control specific property values. Adjusting the Bezier handles creates "easing," allowing objects to accelerate and decelerate naturally.
What Is the Graph Editor and Why Does Your Animation Need It?
In the world of motion design, the difference between a beginner and a professional often comes down to one thing: easing. By default, Adobe After Effects creates "linear" keyframes. This means an object moves from Point A to Point B at a constant speed, starting and stopping instantly. In the physical world, nothing moves this way. Cars must accelerate, and bouncing balls must decelerate at the peak of their arc.
The Graph Editor is a two-dimensional representation of property values where time is represented horizontally and value or speed is represented vertically, according to Adobe's official documentation . It allows you to move away from the rigid "diamond" keyframes and into the world of Bezier curves.
The "Illusion of Life" in Motion
Industry leaders often emphasize that natural movement requires acceleration and deceleration to "trick" the viewer into believing an object has weight and mass. Without these subtle changes in velocity, animations feel stiff and digital. The Graph Editor is the bridge that allows you to inject physics into your layers, transforming a simple sliding box into a weighted object that feels like it belongs in a real-world environment.
How to Open and Navigate the Graph Editor Interface
Opening the Graph Editor is straightforward, but navigating it can be intimidating for new users. You can access it by clicking the small graph icon located next to the search bar in the Timeline panel, or by using the keyboard shortcut Shift + F3 .
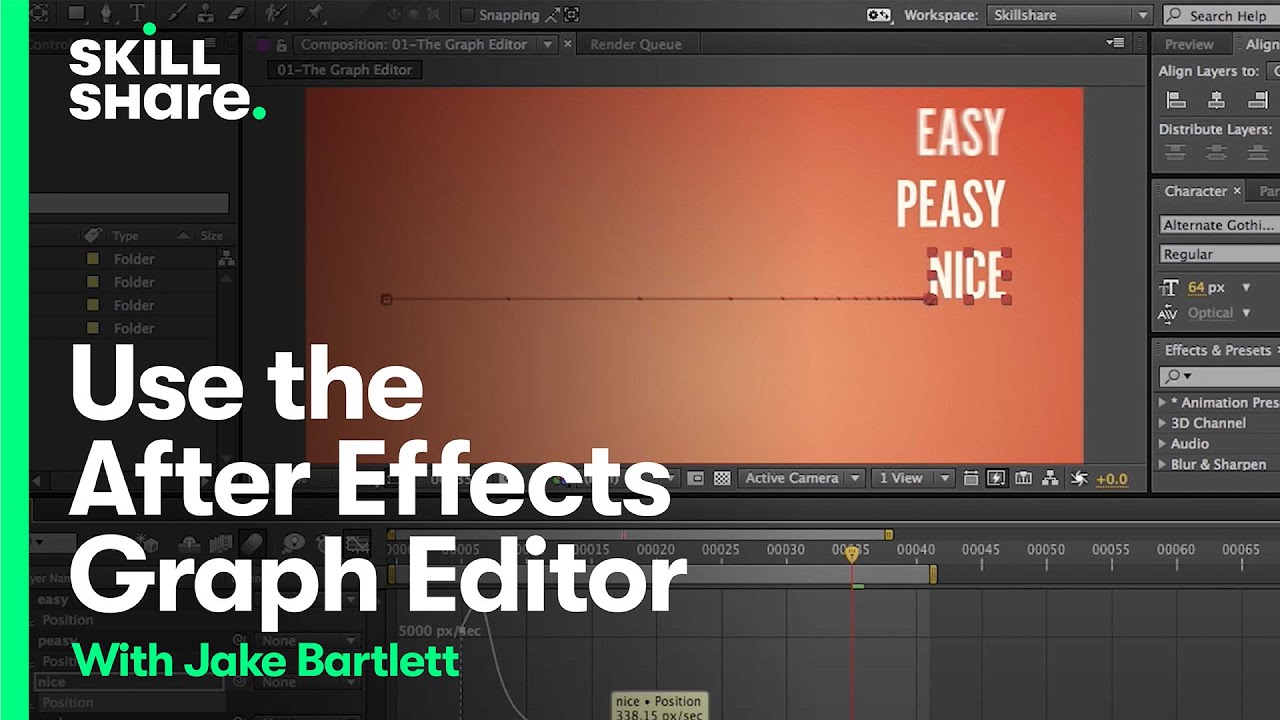
Image source: YouTube
Essential Navigation Tools
- Fit to View: If your graph looks blank or the curves are off-screen, click the magnifying glass icon ("Fit all graphs to view") at the bottom of the editor. This scales the graph to fit your current window perfectly.
- Snapping Mechanics: You can toggle snapping to values, time, and markers. A common power-user trick is holding Ctrl (Windows) or Cmd (Mac) while dragging handles to snap them to the grid or other keyframes.
- Graph Type Menu: The second icon from the left at the bottom of the Graph Editor allows you to switch between the Speed Graph and the Value Graph. Understanding when to use each is vital for a smooth workflow.
Speed Graph vs Value Graph — Which One Should You Use?
One of the most common points of confusion for After Effects users is the distinction between the Speed Graph and the Value Graph. While they both manipulate the same keyframes, they represent the data in fundamentally different ways.
The Value Graph
The Value Graph shows the actual value of a property. For example, if you are animating Opacity, the vertical axis represents 0% to 100%. The steepness of the curve indicates the speed. A vertical line means instant change, while a horizontal line means no change.
Best For: Temporal properties like Opacity, Rotation, and Scale.
The Speed Graph
The Speed Graph shows the rate of change (velocity) rather than the value itself. The vertical axis represents pixels per second (or degrees per second). The higher the peak of the graph, the faster the object is moving at that specific moment.
Best For: Spatial properties like Position and Motion Paths.
The "Separate Dimensions" Requirement
By default, After Effects combines X and Y position into a single property. This makes it difficult to use the Value Graph because the software is trying to graph two different values on one line. To gain full control, right-click the "Position" property and select Separate Dimensions . This splits Position into X Position and Y Position, allowing you to use the Value Graph to create complex, independent curves for each axis.
| Feature | Value Graph | Speed Graph |
|---|---|---|
| Visual Representation | Steepness = Speed | Height = Speed |
| Best For | Opacity, Rotation, Scale | Position, Complex Velocity |
| Handle Behavior | Move vertically and horizontally | Primarily move horizontally (Influence) |
How to Manipulate Bezier Handles for Perfect Easing
To start using the Graph Editor, you must first convert your linear keyframes (diamonds) into Bezier keyframes. The fastest way to do this is by selecting your keyframes and pressing F9 to apply "Easy Ease." This turns the diamonds into hourglass shapes and generates the handles you need to edit the curves.
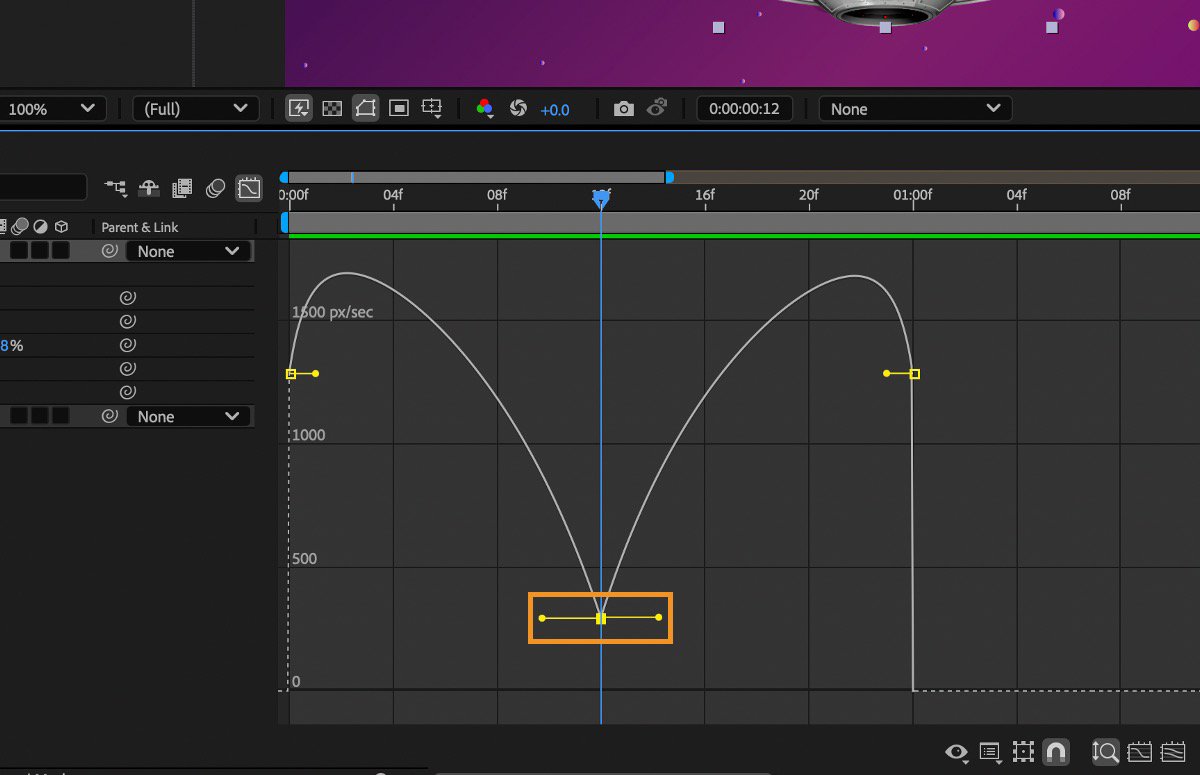
Image source: Adobe Help Center
Influence vs. Speed (Power-User Tip)
When you pull a handle in the Speed Graph, you are adjusting two things: Speed and Influence . According to community experts, Influence is the percentage of the curve's weight. A high influence (e.g., 80%) means the object will stay at its peak speed for a longer duration, creating a very "snappy" or "dramatic" ease. You can see these specific numbers by double-clicking a keyframe to open the Keyframe Velocity dialog box.
Creating the Classic S-Curve
The most common curve in motion design is the "S-Curve" in the Value Graph (or a bell curve in the Speed Graph). This represents an object that starts slow, reaches a peak speed in the middle, and ends slow. To achieve this, pull the incoming handle of your second keyframe to the left and the outgoing handle of your first keyframe to the right. This creates a smooth transition that ranks among the top techniques for professional-looking UI transitions.
Why Are My Graph Editor Handles Missing or Broken?
It is incredibly common to enter the Graph Editor only to find that you cannot see or move your handles. This is rarely a bug and is usually a result of how After Effects handles different property types.
- Problem: The handles are completely gone.
- Solution: You are likely looking at a linear keyframe in the Speed Graph. Linear keyframes do not have Bezier handles. Select the keyframe and press F9 to enable them.
- Problem: I can't move handles vertically in the Speed Graph.
- Solution: In the Speed Graph, handles represent time influence . To change the vertical height (the actual speed), you must move the keyframe itself up or down, or switch to the Value Graph where vertical movement represents the property value.
- Problem: The graph looks like a series of flat blocks or steps.
- Solution: You have "Hold" keyframes applied. Right-click the keyframe and change the Keyframe Interpolation to Bezier or Linear to restore the curve functionality.
How to Fix Common Graph Editor Bugs and UI Glitches
Even in recent versions of After Effects, users occasionally encounter UI glitches that can stall a project. One notable issue is the "Ghosting Bug," where batch-editing velocity via the dialog box fails to update the visual graph. If you change the Influence to 75% in the dialog box but the graph still looks like a default ease, try selecting the parameters individually rather than in bulk to force a refresh.
The "Flat Line" Issue
If your graph appears as a single horizontal line, it usually means the values are so small (or the zoom is so far out) that the change isn't visible. Use the "Fit to View" button mentioned earlier. Additionally, ensure you haven't accidentally deactivated the stopwatch. As noted in Adobe's documentation , clicking the stopwatch again will delete all your keyframes and graph data instantly.
Native Graph Editor vs Third-Party Extensions Like Flow and Kease
While the native Graph Editor is exceptionally strong for precision work, many professionals use third-party extensions to speed up their workflow. Tools like Flow or Kease provide a library of easing presets that you can apply with a single click.
- When to Stay Native: Use the built-in editor when you need unique, complex curves that change over time, or when you are working with multi-property interactions that require frame-by-frame precision.
- When to Use Extensions: Use extensions for high-volume production work where you need consistent easing across hundreds of layers. These tools are a popular choice for sharing curve libraries across a creative team.
Key Takeaways for Mastering Animation Curves
- Separate Dimensions for Position properties to unlock the full potential of the Value Graph.
- Use F9 (Easy Ease) as your starting point to generate Bezier handles, never as the final step.
- The Speed Graph is your best tool for visualizing the "peak" velocity of a movement.
- Influence handles control the weight of the curve; higher influence equals a more dramatic ease.
- Fit to View is the essential button to click whenever your graph looks "lost" or blank.
- Linear keyframes should be avoided for natural movement; always aim for an S-curve or bell curve.
Start by taking one simple animation today—like a sliding text layer—and try to make the curve as extreme as possible to see how it changes the "feeling" of the motion.
Frequently Asked Questions
How do I reset the Graph Editor view if it goes blank?
What is the shortcut for the Graph Editor?
Why can't I see the Value Graph for Position?
How do I make an animation stop suddenly?
Can I copy and paste graph curves between different properties?