Home
Home
How to Use the CapCut Green Screen Editor on PC Mobile and Web
To use the CapCut green screen editor, import your background first, then add your green screen clip as an Overlay (Mobile) or on Track 2 (PC). Use the Chroma Key tool with the color picker to select the green hue, then adjust Strength and Shadow to remove the backdrop. For videos without a green screen, the Auto Removal tool uses AI to isolate human subjects automatically.
Understanding the Different Background Removal Methods in CapCut
CapCut has evolved into a highly versatile video editing suite, offering multiple ways to isolate subjects from their backgrounds. While many users search specifically for "chroma key," the software actually provides three distinct pathways depending on your footage quality and subject matter. Understanding these differences is essential for achieving a professional-looking composite.
The term "Green Screen" refers to the physical backdrop, while "Chroma Key" is the digital process of making a specific color transparent. In recent years, CapCut has integrated machine learning to offer "Auto Removal," which doesn't require a green screen at all. This makes it a top-tier choice for creators who may not have access to professional studio equipment but still want to experiment with creative backgrounds.
| Method | Best For | Level of Control | Hardware Requirement |
|---|---|---|---|
| Chroma Key | Solid green/blue backdrops | High (Manual Sliders) | Physical Green Screen |
| Auto Removal | Human subjects only | Low (AI-driven) | None |
| Custom Removal | Complex edges/objects | Medium (Smart Brush) | None |
When to Use the Manual Chroma Key Tool
The manual Chroma Key tool remains the industry standard for a reason. It provides the most granular control over "spill"—the green light that often reflects onto a subject's hair or shoulders. By using the color picker, you can target the specific shade of green in your video, which is rarely a perfect, uniform hex code due to lighting variations. According to CapCut's official resources , manual adjustments are recommended when you need to preserve fine details like individual strands of hair or transparent objects like glassware.
Why AI Auto Removal Is a Strong Choice for Human Subjects
If you are filming in a bedroom or office without a dedicated backdrop, Auto Removal is a significant advancement in mobile editing. This tool uses neural networks to identify the silhouette of a person and mask out everything else. While it is incredibly convenient, it does have limitations. It may struggle with handheld objects or loose clothing that the AI doesn't recognize as part of the "human" layer. For most social media creators, however, it stands out as a top choice for quick head-and-shoulders style videos.
Using the Custom Smart Brush for Complex Objects
Custom Removal, or the "Smart Brush," acts as a middle ground. You manually paint over the areas you want to keep, and the AI attempts to follow those edges throughout the clip. This is particularly useful for product reviews where you might be holding a non-human object that the standard Auto Removal tool would otherwise delete.
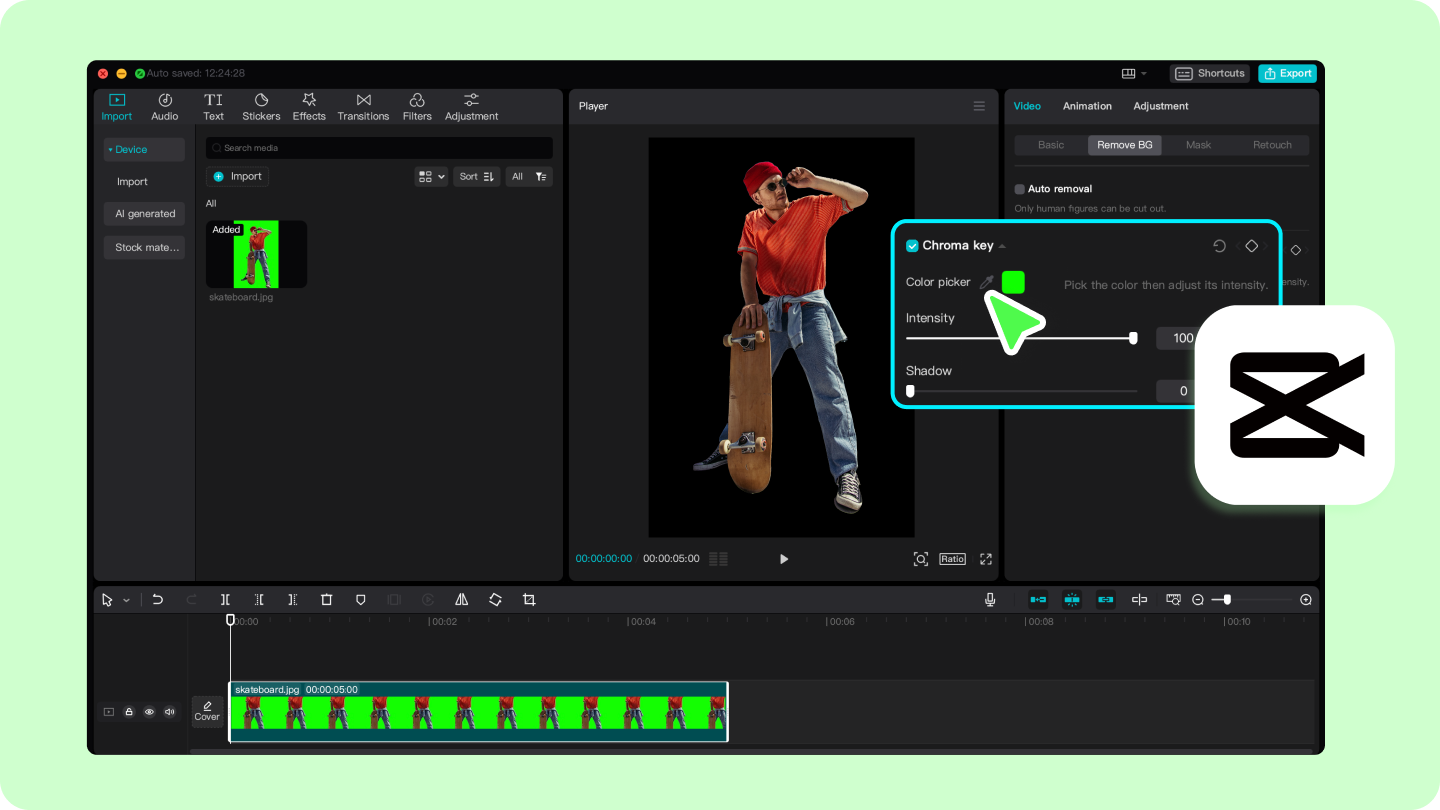
Image source: CapCut
Step by Step Guide for Removing Green Screens in the CapCut Mobile App
The mobile workflow is slightly different from traditional desktop editors because it relies on an "Overlay" system. Many beginners make the mistake of adding their green screen clip as the primary video, which makes it impossible to place a background behind it. Follow these steps to ensure a correct setup:
- Start with the Background: Open a new project and select the image or video you want to appear *behind* your subject. This goes on the main timeline.
- Add the Overlay: Tap the "Overlay" button in the bottom toolbar, then tap "Add Overlay." Select your green screen footage.
- Align and Scale: Pinch the overlay clip on the preview screen to resize it so it covers the background appropriately.
- Access the Cutout Menu: With the overlay clip selected, scroll through the bottom menu and tap "Remove Background" (or "Cutout" in some versions).
- Apply Chroma Key: Select "Chroma Key." Use the circular color picker that appears on the screen and drag it over a section of the green background.
- Adjust Intensity: Tap "Intensity" and move the slider until the green disappears. Be careful not to go too far, or your subject will become transparent.
- Refine with Shadow: This is a crucial step. Increase the "Shadow" slider (usually to 20-40%) to help blend the edges and remove any remaining green "halo" around the subject.
As noted in Miracamp's tutorial , the "Shadow" tool is often the difference between a fake-looking edit and a professional one. It adds a slight artificial shadow to the edges of your subject, which masks the imperfections of the keying process.
How to Navigate the Green Screen Tools in CapCut for PC
The desktop version of CapCut offers a more traditional track-based interface, which many find easier for complex projects. The processing power of a PC also allows for smoother scrubbing when working with high-resolution 4K green screen footage. The workflow here is more robust, allowing for better precision.
In the PC version, your background should be on Track 1 (the bottom track), and your green screen clip should be placed on Track 2 (directly above it). Once your clips are positioned, navigate to the Video tab in the top-right panel, then select the Cutout sub-tab. Here, you will find the checkbox for "Chroma Key."
Controls how much of the selected color is removed. Higher values remove more shades of green but can eat into the subject.
Adds a dark edge to the cutout, which is exceptionally strong at hiding "green spill" on hair and clothing.
A one-click AI solution for PC users who don't have a physical green screen. It is notably innovative in its speed.
For those using the desktop application, BigVU suggests that the PC version handles "edge feathering" slightly better than the mobile app, making it a preferred choice for professional YouTube content or corporate presentations.
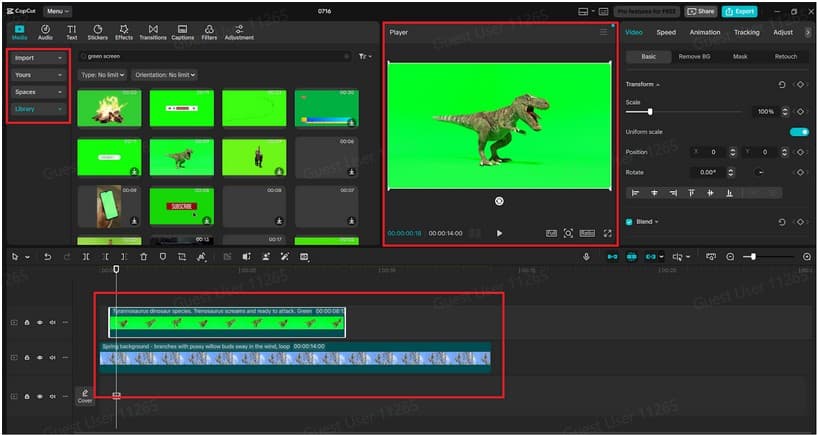
Image source: Toolshero
Editing Green Screen Videos in Your Web Browser
CapCut's web-based editor is an excellent choice for users who do not want to install software or are working on devices like Chromebooks. While it lacks some of the advanced masking tools found on the PC version, it includes unique AI integrations that aren't always available in the offline apps.
One such feature is the AI Background Generator . After you remove your green screen using the online Chroma Key tool, you can type a text prompt (e.g., "a futuristic cyberpunk office") and the web editor will generate a new background for you. This integration makes the web version a highly impactful tool for rapid prototyping and creative brainstorming. According to CapCut's online tool page , this process is entirely free and requires no credit card, making it accessible to everyone.
How to Fix Common CapCut Green Screen Glitches and Export Errors
Even with a top-tier editor, technical issues can arise. One of the most frustrating problems reported by the community is the "Green Screen of Death," where the entire video turns green or the preview window goes black during the editing process. This is rarely a fault of the footage itself and is usually related to how the software interacts with your computer's hardware.
Other common issues include:
- Green Spill
- When green light reflects onto the subject. Fix this by increasing the "Shadow" slider or moving the subject further from the screen.
- Crawling Edges
- A "buzzing" effect around the subject's hair. This is usually caused by low-light noise in the original footage. Use the "Strength" slider conservatively.
- Export Failure at 99%
- Often caused by a lack of storage space or a conflict with "Hardware Encoding." Try disabling hardware encoding in the export pop-up menu.
Tips for Setting Up a Professional Physical Green Screen Environment
The quality of your digital edit is 90% dependent on the quality of your physical setup. Even the most advanced AI struggles with a wrinkled, poorly lit green screen. To achieve a clean "key," you must treat the screen and the subject as two separate lighting challenges.
The 6-Foot Rule: One of the most important tips is to keep your subject at least six feet away from the green screen. When a subject stands too close, the green light bounces off the screen and hits their back, creating a green outline that is nearly impossible to remove perfectly in post-production. By creating distance, you allow the green light to dissipate before it reaches the subject.
Lighting Consistency: You want the green screen to be as "flat" as possible. This doesn't mean the screen itself is flat, but that the light hitting it is even. Avoid using a single bright light, which creates a "hotspot" (a bright white center) and dark corners. Instead, use two softbox lights placed at 45-degree angles to the screen. Then, use a separate light source for your subject to create separation. As noted in CapCut's setup guide , avoiding shadows on the backdrop is the single most important factor for a clean cutout.
Creative Ways to Use Green Screen Assets and Multi Layer Compositing
Green screen technology isn't just for changing your location to a tropical beach. Advanced creators use it for "UI Mockups" and "Asset Stacking." For example, you can download "Green Screen Social Media Lower Thirds"—small animations of "Subscribe" buttons with a green background. By using the Chroma Key tool on these assets, you can overlay professional animations onto your video without needing to animate them yourself.
Multi-layer compositing involves stacking several green screen layers. You might have a background on Track 1, a green screen window frame on Track 2, and a green screen character on Track 3. By keying out both Track 2 and Track 3, you create a complex 3D environment. This technique is widely regarded as a top-performing method for creating high-value storytelling content on a budget.
Frequently Asked Questions About CapCut Green Screen Editing
Is the green screen editor free to use in CapCut?
Why is my subject's hair looking blurry after removing the green screen?
Can I use a blue screen instead of a green screen in CapCut?
What is the difference between Chroma Key and Auto Removal?
How do I fix the green outline around my subject?
Key Takeaways for Mastering Your Green Screen Edits
Achieving a high-quality background removal requires a combination of proper physical preparation and technical fine-tuning. Here are the essential points to remember:
- Choose the right tool: Use Chroma Key for solid backdrops and AI Auto Removal for quick human isolation without a screen.
- Master the Overlay: On mobile, always add your green screen footage as an "Overlay" to the main background track.
- Prioritize Lighting: Ensure your physical green screen is lit evenly with no wrinkles or hotspots to avoid "crawling edges."
- Use the Shadow Slider: Always adjust the "Shadow" setting to at least 20% to blend the subject naturally into the new background.
- Fix Glitches Early: If you encounter display errors on PC, disable "Hardware Encoding" in the performance settings immediately.
- Distance is Key: Keep subjects 6 feet away from the screen to prevent green light from reflecting onto their skin and hair.
For your next project, try combining a custom-generated AI background with a well-lit manual chroma key to see how professional your mobile edits can truly look.