Home
Home
How to Download and Set Up Line 6 HX Edit for Your Helix Device
To download the line 6 hx editor (HX Edit), visit the official Line 6 Software Page . Select "HX Edit" from the first dropdown, choose your specific hardware (e.g., HX Stomp) in the second, and your operating system in the third. HX Edit is a unified interface that allows you to manage presets, load Impulse Responses (IRs), and update firmware for the entire Helix and HX family of processors.
Managing a complex guitar processor like the Helix Floor or HX Stomp directly from the hardware interface can be time-consuming. The line 6 hx editor , officially known as HX Edit, transforms this experience by providing a visual, drag-and-drop environment on your computer. Whether you are a touring professional or a bedroom enthusiast, mastering this software is essential for getting the most out of your gear.
In this guide, we will cover everything from the initial download to advanced Linux workarounds and recovery protocols for unresponsive units. By following these steps, you will ensure your device remains stable and your creative workflow stays uninterrupted.
Where Can You Find the Official HX Edit Download?
The most reliable way to obtain the software is directly from the manufacturer. Navigating the Line 6 website can sometimes be confusing due to the sheer volume of legacy products listed. To find the correct version of the line 6 hx editor , follow these specific steps on the Line 6 software downloads page :
Select "HX Edit" from the first menu. Do not select "Line 6 Monkey" or "Helix Native" unless you specifically need those tools.
Choose your specific device, such as "Helix Floor," "HX Stomp," or "HX Effects." This ensures the installer includes the correct drivers for your unit.
Select your operating system (Windows 10, Windows 11, or macOS). Click "Go" to see the latest available version.
Image source: Line 6 | Software Downloads
Which Line 6 Devices Work With the HX Edit Software?
HX Edit is a unified application, meaning one piece of software handles multiple different hardware units. However, the interface you see will change depending on what is plugged in. For example, if you connect an HX Stomp, the editor will only show six or eight blocks (depending on firmware), whereas a Helix Floor will show the full dual-path signal chain.
The following table outlines the compatibility and hardware limits for the current HX family as of 2026:
| Device Name | Max Blocks | DSP Limit | HX Edit Support |
|---|---|---|---|
| Helix Floor / Rack | 32 | Dual DSP | Full Support |
| Helix LT | 32 | Dual DSP | Full Support |
| HX Stomp / XL | 8 | Single DSP | Full Support |
| HX Effects | 9 | Single DSP | Full Support (No Amps) |
It is important to note that while the line 6 hx editor looks similar to the "Helix Native" plugin, they are different tools. HX Edit is a remote control for your hardware, while Helix Native is a standalone plugin that runs entirely on your computer's CPU. You cannot use HX Edit without a supported hardware device connected via USB.
How to Install HX Edit on Windows and macOS
The installation process is generally straightforward, but there are critical steps regarding drivers that users often overlook, leading to connection issues later. On Windows, the installer package includes the HX Edit application, the Line 6 Updater utility, and the necessary ASIO drivers.
Windows Installation Steps
When running the .exe installer on Windows 10 or 11, you will be prompted to select components. Ensure that "Drivers" and "Line 6 Updater" are both checked. During the process, Windows may ask for permission to install device software from "Line 6, Inc." You must click "Install" or "Allow" for the hardware to communicate with the editor.
macOS Installation Steps
For macOS users, including those on Apple Silicon (M1, M2, M3) chips, the installation involves opening the .dmg file and dragging the application to your Applications folder. Recent versions of macOS have strict security protocols; you may need to go to System Settings > Privacy & Security to "Allow" the Line 6 driver if the device isn't recognized immediately.
Can You Run HX Edit on Linux Using Wine?
Officially, Line 6 does not support Linux. However, the community has developed a remarkably stable workaround using Wine and USB-over-network tools. This is a premier choice for users who prefer open-source operating systems but still want to manage their Helix presets.
The primary challenge on Linux is not running the software itself, but bridging the USB connection so that the Windows-based application inside Wine can "see" the hardware. According to community documentation on the LinuxMusicians forum , the most effective method involves using VirtualHere or USBIP .
wine regsvr32 wineasio.dll
# Use VirtualHere to attach the Helix USB device
vhclientx86_64 -t "LIST"
vhclientx86_64 -t "USE,Line 6 Helix"
Once the USB bridge is established, HX Edit typically runs with high stability. Users have reported that even firmware updates can be performed this way, though it is generally safer to use a native Windows or Mac machine for firmware tasks to avoid potential data corruption during the write cycle.
How to Connect Your Hardware to Your Computer for the First Time
Connecting your device might seem as simple as plugging in a cable, but the line 6 hx editor is sensitive to the quality of the connection. Many "Device Not Found" errors are caused by poor cabling or the use of unpowered USB hubs.
Avoid using unpowered USB-C to USB-A hubs or long extension cables when connecting your Helix. These can cause intermittent data drops, which are particularly dangerous during firmware updates. A direct connection to a USB 2.0 port on your motherboard or laptop is highly recommended.
For the most stable experience, follow this connection sequence:
- Power off your Helix or HX device.
- Connect the USB cable to a direct port on your computer.
- Power on the Helix and wait for it to reach the home screen.
- Launch the HX Edit software.
If the software shows a "No Device Connected" message, check the bottom left corner of the interface. If the icon is greyed out, try a different USB port. On Windows, check the Device Manager to ensure "Line 6 Helix" appears under "Sound, video and game controllers" without any yellow exclamation marks.
How to Update Your Firmware Using WiFi or USB
Keeping your firmware current is vital for accessing new amp models and effects. Line 6 has recently introduced a significant advancement in how updates are handled for "Helix Stadium" units (the Floor, Rack, and LT models).
The Traditional USB Method
For most users, the update process involves the Line 6 Updater utility. You launch the updater, log into your Line 6 account, and select the latest firmware version. The software then puts your device into "Update Mode" and begins the transfer. This process typically takes 5 to 15 minutes.
The WiFi Update Method
Newer firmware versions for flagship Helix units now support updates via WiFi. This allows the device to download the update package directly from Line 6 servers without being tethered to a computer. While this is a convenient option, ensure you have a stable internet connection before starting, as an interrupted download can lead to a failed boot cycle.
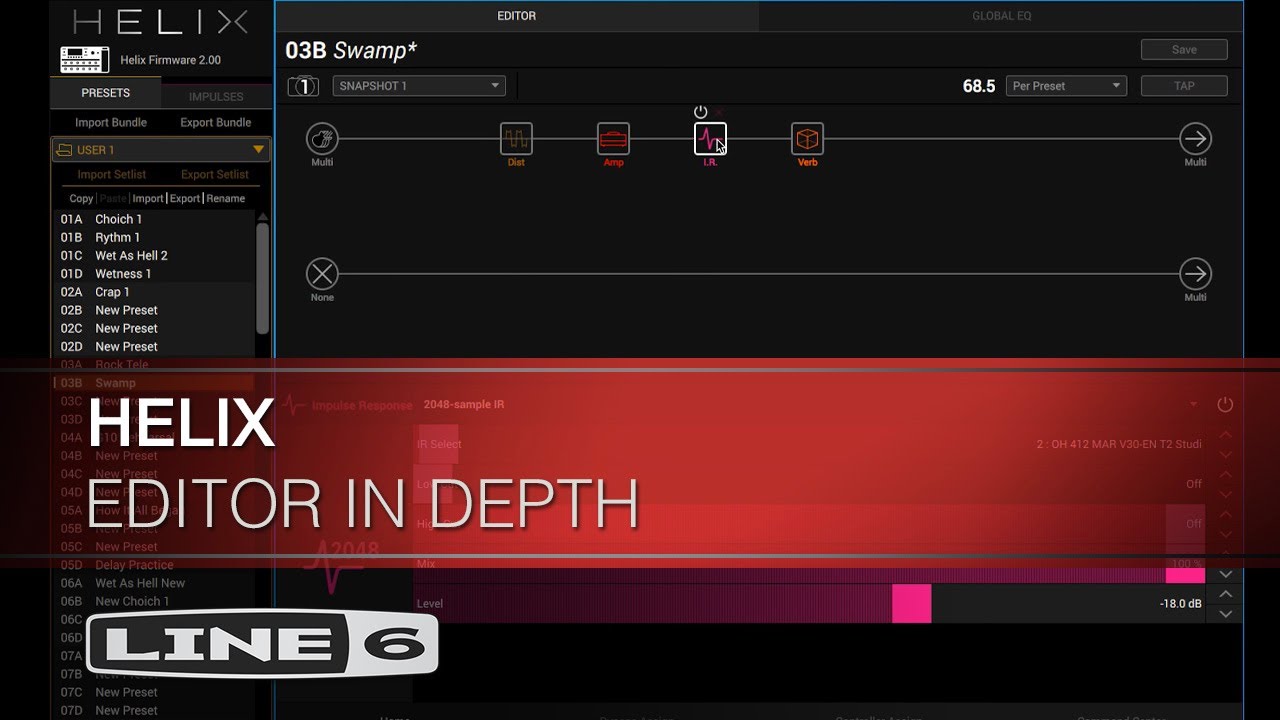
Image source: YouTube
What Should You Do if HX Edit Does Not Recognize Your Device?
If you encounter the dreaded "No Device Connected" error despite having the cables plugged in, you may need to perform a "Safe Boot" or use the Recovery Protocol. This is a common pain point discussed in the Line 6 Support Forums .
The Recovery Protocol (Safe Boot)
If an update fails and your unit is stuck on a blank screen or a "Boot Failure" message, follow these steps to force the device into a state where the line 6 hx editor or Updater can see it:
- Power off the unit.
- Helix Floor/LT: Hold footswitches 6 and 12 (the two right-most switches on the middle and bottom rows) while powering on.
- HX Stomp: Hold footswitches 2 and 3 while powering on.
- The screen should indicate "Update Mode."
- Connect to your computer and run the Line 6 Updater to reinstall the firmware.
This protocol bypasses the standard boot sequence and allows the hardware to communicate at a basic level, which is often enough to fix a "bricked" unit.
How to Manage Presets and Load Impulse Responses
One of the strongest features of the line 6 hx editor is the ability to manage your library of sounds. The software uses a proprietary `.hlx` file format for presets and `.hxb` for full device backups.
Importing Impulse Responses (IRs)
Impulse Responses are essential for achieving realistic cabinet tones. To load them, click on the "Impulses" tab in the editor. You can drag and drop `.wav` files directly into the numbered slots. Remember that the Helix does not "embed" the IR into the preset; it simply points to a slot number. If you move an IR from slot 10 to slot 20, any preset looking for slot 10 will now sound incorrect.
Creating a Safe Update Cycle
To ensure device stability, many professional users follow a specific sequence when managing their presets and updates:
- Backup: Create a full `.hxb` backup file before any changes.
- Update: Perform the firmware update via USB or WiFi.
- Factory Reset: Perform a factory reset (holding FS 9+10 on Floor) to clear the internal database.
- Restore: Use HX Edit to restore your backup, which will rebuild the preset library for the new firmware.
Can You Control HX Edit From an iPad or Android Tablet?
As of 2026, there is no native mobile app for the line 6 hx editor . This is a frequent request in the community, but the DSP requirements for the real-time editor currently favor desktop operating systems. However, there are two popular workarounds:
Remote Desktop Solutions
You can run HX Edit on a laptop and use a tablet to "remote in" using apps like Chrome Remote Desktop or VNC Viewer. This allows you to stand across the room or on stage and adjust your parameters via the tablet's touchscreen while the laptop does the heavy lifting.
Third-Party MIDI Controllers
Some users utilize mobile apps like "MIDI Designer Pro" or "TouchOSC" to build custom control surfaces. While these don't offer the full visual signal chain of HX Edit, they allow for basic parameter adjustments (like gain or delay time) over a wireless MIDI connection.
Why You Should Stop Using Line 6 Monkey for Modern Helix Units
If you have been a Line 6 user for a long time, you might be familiar with "Line 6 Monkey." This was the standard update utility for legacy products like the POD HD, X3, and Variax guitars. However, for the Helix and HX family, Line 6 Monkey is deprecated .
Attempting to use Monkey with a modern Helix can lead to driver conflicts or incomplete firmware installations. The line 6 hx editor package includes everything you need. If you see Monkey mentioned in old forum posts from 2015 or 2016, ignore it in favor of the modern HX Edit and Line 6 Updater workflow. Keeping legacy software on your system can sometimes interfere with the modern ASIO drivers required for low-latency editing.
Frequently Asked Questions
Yes, HX Edit is completely free to download and use for anyone who owns a supported Line 6 hardware device. You do not need a license key or activation code; the software simply requires a compatible device to be connected via USB to function.
No, HX Edit is a remote control interface, not a standalone processor. It requires the hardware's DSP to render the signal chain. If you want to edit tones without your hardware, you would need to purchase "Helix Native," which is a separate plugin designed for DAWs.
Yes, HX Edit is fully compatible with Windows 11. Ensure you download the latest version from the Line 6 website to ensure the drivers are correctly signed for the newer OS security requirements.
A Check Sum Error usually indicates that the preset file is corrupted or was created in a much newer version of the firmware than what you are currently running. Try updating your firmware and the HX Edit software to the latest versions to resolve this mismatch.
In HX Edit, go to the "File" menu and select "Create Backup." This will generate a single `.hxb` file containing all your presets, setlists, Impulse Responses, and global settings. It is a premier practice to do this weekly if you are actively gigging.
The Bottom Line: Best Practices for a Stable HX Edit Experience
Mastering the line 6 hx editor is the most effective way to streamline your tone-building process and ensure your hardware remains reliable for years to come. By following the structured workflows outlined in this guide, you can avoid common pitfalls like connection drops and failed updates.
- Use direct USB connections and avoid unpowered hubs to prevent data corruption.
- Match software versions between HX Edit and your device firmware for full feature compatibility.
- Perform full backups (.hxb) before every firmware update or major preset reorganization.
- Utilize the Recovery Protocol (Safe Boot) if your unit becomes unresponsive during an update.
- Transition away from legacy tools like Line 6 Monkey to avoid modern driver conflicts.
- Leverage the Linux workaround if you are an advanced user on an open-source platform.
For your next session, try organizing your Impulse Responses into logical categories within the editor to speed up your cabinet selection process.