Home
Home
How to Use a Hue Editor to Change Image Colors Without Losing Quality
What Is a Hue Editor and How Does It Actually Work?
At its core, a hue editor is a specialized image processing tool designed to manipulate the "Hue" component of the HSL (Hue, Saturation, Lightness) color model. Unlike traditional RGB editing, which adjusts the intensity of Red, Green, and Blue light, HSL editing treats color as a distinct property that can be shifted independently of its vividness or brightness.
The HSL Framework
Hue represents the actual type of color—what we commonly name "red," "blue," or "green." In the HSL system, hue is mapped to a 360-degree circle. According to technical documentation from Gifgit , this circular logic means that shifting a color by 360 degrees brings you right back to where you started. This is why most hue editors feature a slider ranging from -180° to +180°, allowing you to reach any point on the wheel with a single movement.
The 360° Logic and Color Rotation
When you move a hue slider, you are essentially "rotating" every pixel's color value by a specific number of degrees. For example:
- 60°: Shifts toward Yellow.
- 120°: Shifts toward Green.
- 240°: Shifts toward Blue.
- 300°: Shifts toward Magenta.
This mathematical rotation is highly effective because it preserves the relationships between colors. If you have a photo of a sunset with oranges and purples, shifting the hue by 30 degrees will move the oranges toward yellow and the purples toward magenta, maintaining the visual harmony of the original composition.
High-quality hue editors do not affect pixels that are purely black, white, or gray. Because these "neutral" pixels have zero saturation, they technically have no hue to rotate. This ensures that shadows and highlights remain natural even after a dramatic color shift.
The Technical Reason Most Online Hue Editors Ruin Your Image Quality
Not all hue editors are created equal. Many lightweight web tools rely on a "shortcut" that can lead to significant degradation in image quality, particularly in the yellow and cyan spectrums. Understanding this distinction is vital for anyone performing professional-grade color correction.
The CSS Filter Warning
Many "quick" online tools utilize the
hue-rotate
CSS property to display changes. While this is fast for browsers to render, it is a mathematical approximation. As noted by
ImageOnline
, these approximations often fail to maintain consistent luminosity. This results in "brightness drift," where colors become unexpectedly darker or lighter as you shift them.
The "Muddy Yellow" Problem
The most common artifact of low-quality hue shifting is the distortion of yellows and cyans. In a basic editor, shifting a vibrant red toward yellow often results in a "muddy" or brownish-gray tone rather than a crisp, bright yellow. This happens because the tool is not performing a per-pixel conversion; it is simply applying a color matrix overlay that doesn't account for the human eye's sensitivity to different wavelengths.
True HSL Conversion
For professional results, you should look for tools that perform a full RGB → HSL → RGB conversion. This process involves three distinct steps for every single pixel:
- Convert the pixel's Red, Green, and Blue values into HSL coordinates.
- Add the desired degree shift to the Hue coordinate.
- Convert the new HSL coordinates back into RGB for display or export.
Tools like Uwarp utilize this per-pixel method, ensuring that the saturation and lightness remain perfectly constant while only the color type changes.
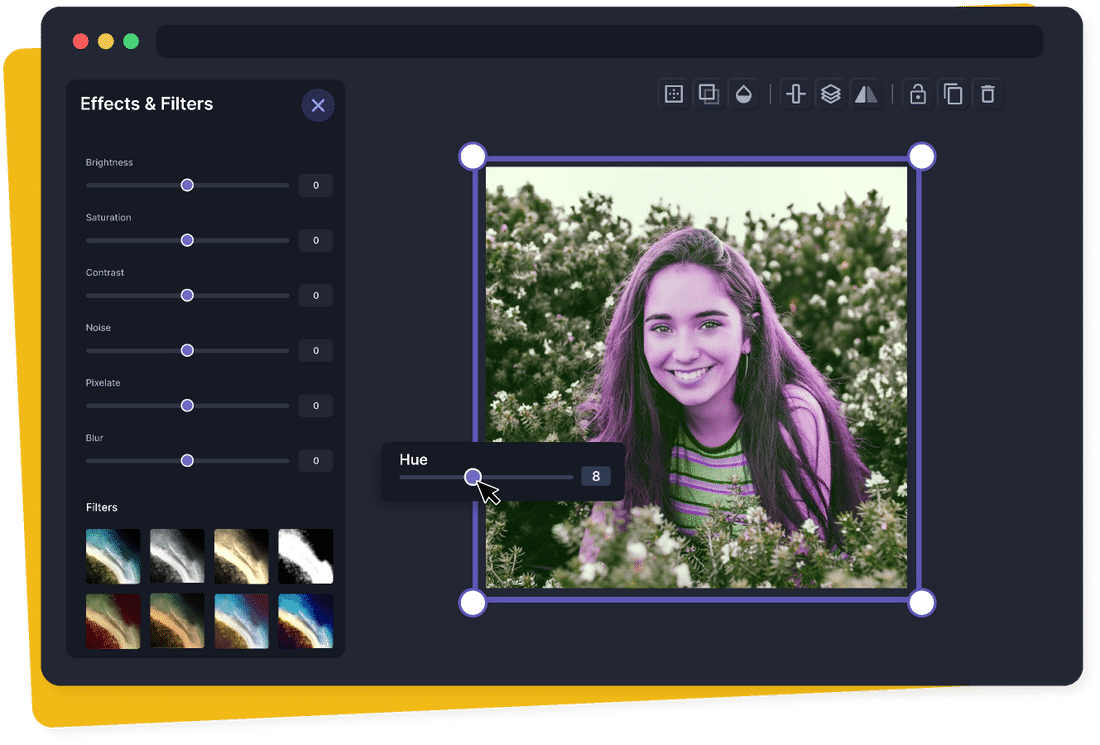
Image source: Pixelied
How to Change the Color of Just One Object in an Image
A common frustration for users is the "Global Shift" problem. If you want to change the color of a red car in a photo, a standard hue editor will also turn the blue sky purple and the green grass orange. Solving this requires a more advanced approach known as selective editing.
The 8-Band Selective Editing Approach
Professional software like Luminar Neo or Vayce isolates specific color ranges using an "8-band" system. Instead of one slider for the whole image, you get individual controls for Reds, Oranges, Yellows, Greens, Cyans, Blues, Purples, and Magentas. This allows you to target the "Reds" band specifically to change the car's color while leaving the "Blues" (sky) and "Greens" (grass) untouched.
The "Area Selection" Workaround
If you are using a simpler tool, look for an "Area Selection" or "Masking" feature. OnlinePNGTools offers a way to limit hue shifts to specific rectangular coordinates. By defining the box around the object you want to change, you can prevent the rest of the image from being affected.
Which Hue Editor Is Right for Your Specific Project?
Choosing the right tool depends on your technical needs, such as whether you need to preserve transparency in a PNG or automate shifts for thousands of product photos.
| Tool Category | Best For | Key Feature | Platform |
|---|---|---|---|
| Online Web Tools | Quick social posts & PNGs | Instant browser sliders | Pinetools, OnlinePNGTools |
| Pro Software | Product photography | Masking & Layering | Luminar Neo, Fotor |
| Developer APIs | E-commerce automation | Bulk URL parameters | Cloudinary, Imgix |
| Mobile Apps | On-the-go editing | Preset filters | Pixlr, Lightroom Mobile |
Curated Recommendations
- For Transparent PNGs: OnlinePNGTools is a top-tier choice because it preserves the alpha channel (transparency) perfectly while shifting colors.
- For Professional Control: Skylum Luminar offers exceptionally strong selective editing capabilities that allow for natural-looking color swaps.
-
For Developers:
Cloudinary
provides a robust API that allows you to change hues dynamically by simply adding a parameter like
e_hue:80to an image URL.
Professional Hue Shifting Techniques for Pixel Art and Design
In the world of digital design and pixel art, hue shifting is used for more than just fixing mistakes; it is a fundamental technique for creating depth and vibrancy. Professional artists rarely just change the brightness of a color to create shadows.
Warm Highlights and Cool Shadows
A common secret among pixel artists is to shift the hue as they change the value. Instead of making a shadow just a "darker red," they shift the hue toward blue or purple. Conversely, highlights are often shifted toward yellow or orange. This mimics how light works in the real world—sunlight is warm, while ambient shadows often take on the cool tones of the sky. This technique creates a much more vibrant and "alive" feel than a simple global rotation.
The Modular Barrier Problem
For data scientists and advanced designers, the "Modular Barrier" is a significant technical hurdle. Because hue is circular, 359° and 1° are visually almost identical (both are shades of red), but mathematically they are at opposite ends of the scale. As discussed in the Image.sc Forum , calculating the "average hue" of an image can result in completely wrong data if you don't account for this 360-to-0 jump. Advanced editors use circular statistics to ensure that color distributions are calculated accurately.
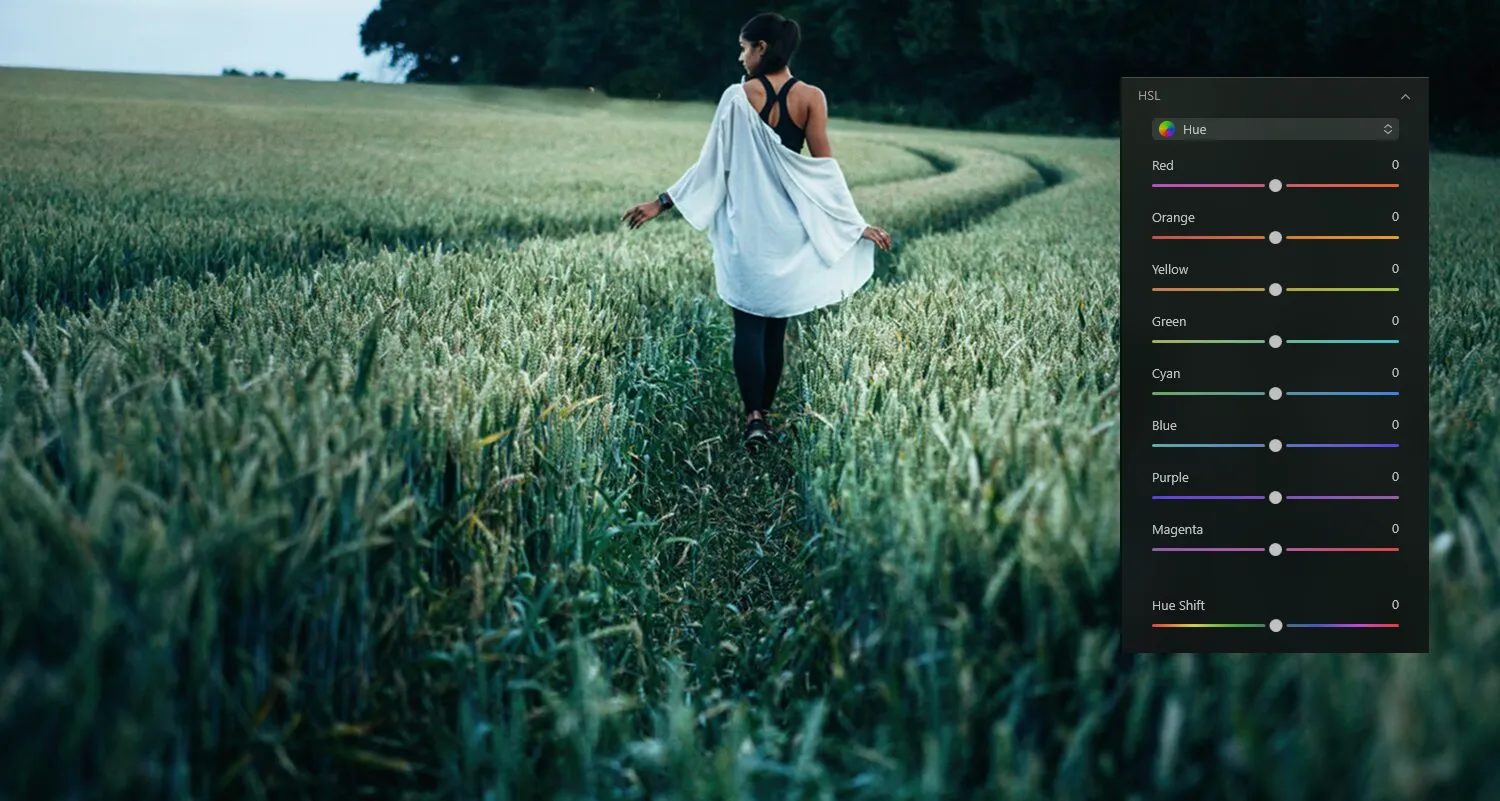
Image source: Skylum
How to Automate Hue Changes for Thousands of Images at Once
For e-commerce businesses, manually editing every product photo to show different color variants is inefficient. If you have a single high-quality photo of a t-shirt, you can use a hue editor API to generate every color variant instantly.
The E-commerce Use Case
By using a service like Cloudinary, you can store one "master" image and serve different versions to your customers based on their selection. If a customer clicks "Forest Green," your website can automatically request the image with a
+120
hue shift. This saves storage space and drastically reduces the time needed for content management.
Batch Processing Pitfalls
When running bulk scripts, the "Small Moves Rule" is essential. Experts suggest that for natural-looking corrections, you should stay within a range of ±5° to ±15° . If you are performing a massive shift (e.g., +180°), you must test the script on a diverse sample of images first. A shift that looks great on a blue car might turn a model's skin tone into an unnatural shade of green, which is why selective masking is often required even in automated workflows.
Frequently Asked Questions
To change a single color without affecting the rest of the image, you need a selective hue editor or a tool that supports masking. You can define a specific color range (like "Reds") and adjust only that band, or use a brush tool to "paint" the hue shift onto a specific object. This prevents global changes to the background or skin tones.
Hue is the "what" of a color—its position on the color wheel (red, blue, green). Saturation is the "how much"—the intensity or purity of that color. A high saturation makes a color look vivid, while low saturation makes it look washed out or gray. A hue editor changes the color type, while a saturation editor changes the color's strength.
This usually happens when using low-quality tools that rely on CSS filters or basic color overlays. These tools often fail to maintain the original brightness (lightness) of the pixels during the shift. To avoid this, use a tool that performs per-pixel RGB-to-HSL conversion, which ensures the lightness remains constant while the color rotates.
Yes, you can use the
filter: hue-rotate(90deg);
property in CSS. While this is highly effective for simple UI elements or hover effects, it is not recommended for professional photo editing because it can cause color distortion and brightness drift in complex images.
Generally, no. Changing the hue modifies the color data of the existing pixels but does not add new pixels or increase the resolution. However, if you export the image in a different format (e.g., converting a PNG to a WebP) or apply heavy compression during the save process, the file size will change based on those export settings.
Key Takeaways for Effective Color Modification
- Prioritize True HSL editors over CSS-based tools to prevent "muddy" colors and brightness drift.
- Use the 360-degree wheel logic to predict results: +120° for green, +240° for blue.
- Apply selective editing or masking when you need to change one object without ruining the background.
- Maintain neutral tones by choosing tools that ignore black, white, and gray pixels during rotation.
- Leverage APIs like Cloudinary for e-commerce to automate color variants for thousands of images.
- Follow the Small Moves Rule (±15°) for natural color correction; save larger shifts for creative effects.
- Export as PNG after editing to avoid the quality loss associated with double-compression in JPEGs.
Start by testing a small ±10 degree shift on your image to see how the highlights and shadows respond before committing to a full color swap.